Your Guide to Making and Canning Fresh Strawberry Chia Jam
Imagine capturing the vibrant taste of summer in a jar, ready to brighten your mornings long after strawberry season has passed. Homemade jam is a timeless pleasure, but what if you could create a version that's not only bursting with fresh flavor but also healthier and incredibly easy to make? Enter
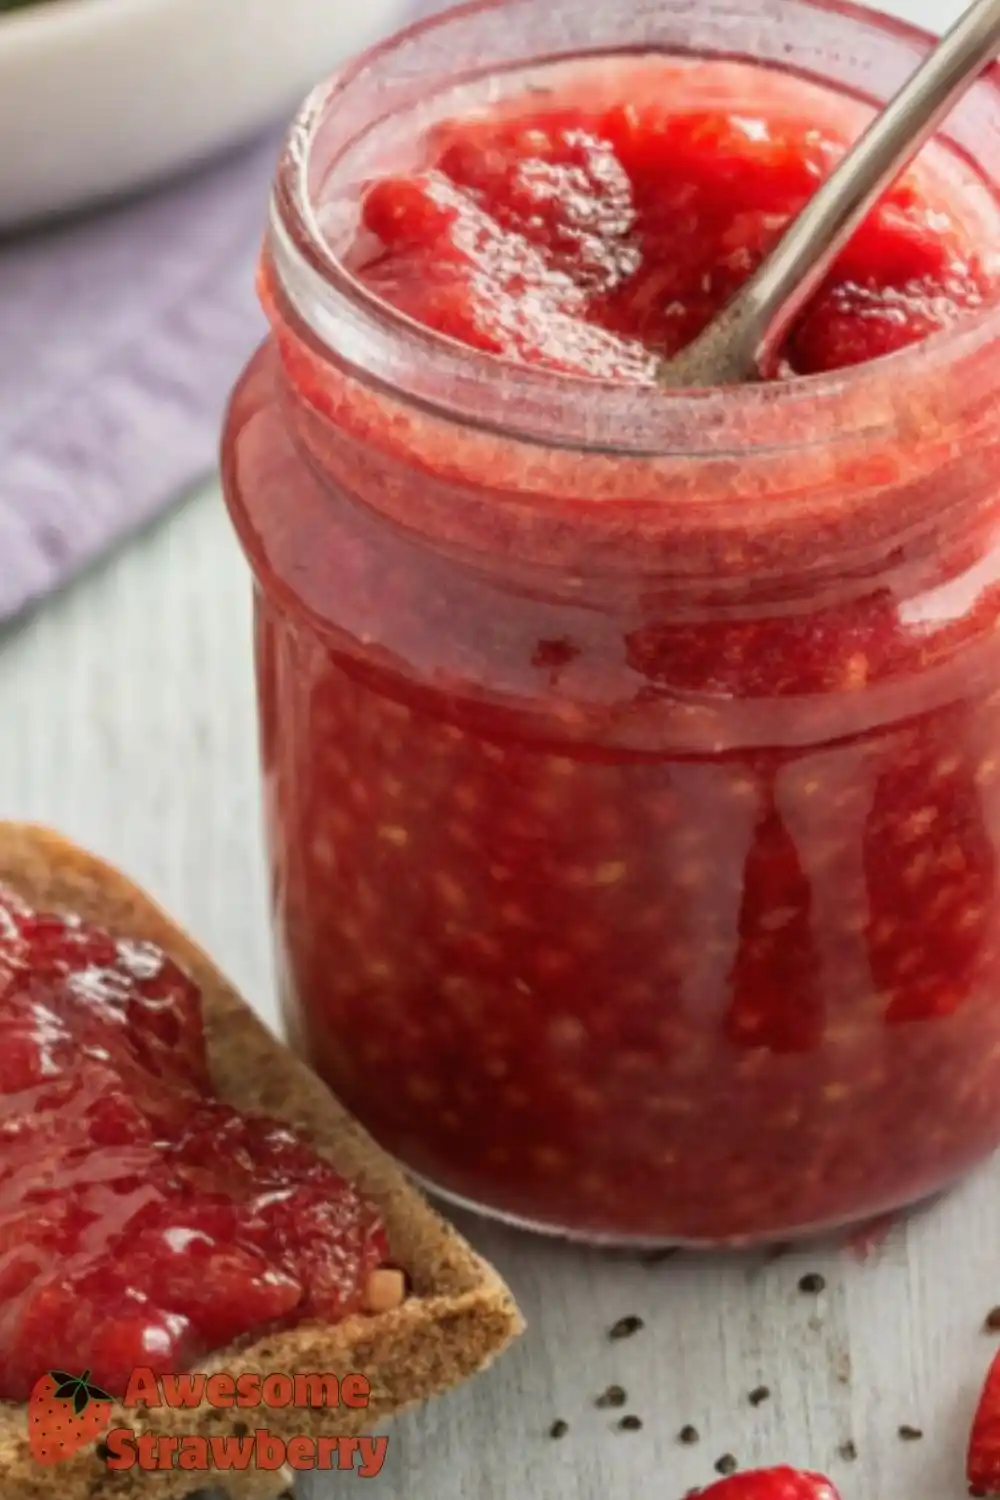
fresh strawberry chia jam. This modern take on a classic preserve leverages the natural gelling power of tiny chia seeds, eliminating the need for added pectin and often requiring less sugar than traditional recipes. The result is a deliciously spreadable jam packed with fiber and omega-3s, offering a guilt-free indulgence that's perfect for spreading on toast, stirring into yogurt, or even dolloping onto pancakes.
While the idea of homemade jam might conjure images of long hours over a bubbling pot,
fresh strawberry chia jam simplifies the process dramatically. It sets naturally, cooks quickly, and with proper canning techniques, can be safely stored for months, allowing you to savor that fresh taste of summer whenever you desire. This comprehensive guide will walk you through every step, from selecting the perfect berries to safely canning your beautiful homemade creation.
Why Choose Fresh Strawberry Chia Jam? Health, Ease, and Flavor
There are countless reasons why
fresh strawberry chia jam has become a favorite among home cooks seeking both convenience and health benefits. Traditional jams often rely heavily on pectin, a gelling agent, and significant amounts of sugar to achieve their set. While delicious, they can be quite high in refined sugars. Chia jam, however, offers a refreshingly different approach.
*
Naturally Thickened: Chia seeds are hydrophilic, meaning they absorb liquid and form a gel. This unique property allows them to thicken the jam naturally, eliminating the need for commercial pectin. This not only simplifies the ingredient list but also offers a more whole-food approach to jam making.
*
Healthier Profile: By reducing or customizing the amount of added sugar and incorporating nutrient-dense chia seeds, this jam becomes a powerhouse of goodness. Chia seeds are an excellent source of dietary fiber, protein, and essential omega-3 fatty acids, contributing to digestive health, satiety, and overall well-being.
*
Quick and Easy: Forget hours of simmering.
Fresh strawberry chia jam often comes together in under 30 minutes, sometimes even quicker if you opt for a no-cook version (though we’ll focus on the cooked and canned method here for shelf stability). The minimal cooking time helps preserve the vibrant flavor and nutritional integrity of the strawberries.
*
Vibrant, Fresh Flavor: Because the strawberries are cooked for a shorter period, their bright, fresh taste truly shines through. It’s a jam that tastes unequivocally like fresh strawberries, making it an instant favorite.
*
Versatility: Beyond the obvious toast and scones, this jam is fantastic in smoothies, as a topping for oatmeal or overnight oats, swirled into Greek yogurt, or even used as a layer in parfaits and desserts. For more ideas on integrating this delightful spread into your diet, check out
Quick Strawberry Chia Jam: Fresh Flavor, Fiber & Omega-3s.
Essential Ingredients and Tools for Success
Making and canning your own
fresh strawberry chia jam requires a few key ingredients and specific tools to ensure a delicious, safe, and properly sealed product. Precision in preparation is crucial, especially when it comes to canning.
Ingredients: The Foundation of Flavor
The beauty of
fresh strawberry chia jam lies in its simplicity. You only need a handful of wholesome ingredients:
*
Fresh Strawberries: Aim for 4 cups, hulled and chopped. The quality of your strawberries is paramount. Choose ripe, firm berries that are deeply red and fragrant. Avoid overly soft or bruised fruit, as this can impact flavor and consistency. Organic strawberries are a plus if available.
*
Chia Seeds: 1/4 cup. These tiny powerhouses are your natural thickener. They absorb liquid and create the characteristic jam-like consistency.
*
Granulated Sugar (or Sweetener of Choice): 1/2 to 3/4 cup, adjusted to taste. Sugar not only sweetens the jam but also acts as a natural preservative. While you can reduce the amount compared to traditional jams, a certain level is beneficial for canning. For a healthier alternative, you can experiment with honey, maple syrup, or sugar substitutes, though these might alter the jam's final consistency and shelf life slightly if canning. Always research alternative sweetener effects on canning safety.
*
Fresh Lemon Juice: 1 tablespoon. This is more than just a flavor enhancer; lemon juice provides essential acidity. In canning, acid is vital for ensuring food safety by inhibiting the growth of harmful bacteria. It also brightens the strawberry flavor and helps with the gelling process.
Tools: Equipping Your Kitchen for Canning
Having the right equipment ensures your jam-making and canning process is smooth, safe, and successful.
*
Large Saucepan: For cooking the jam. Choose one with a heavy bottom to prevent scorching.
*
Potato Masher or Fork: For lightly mashing strawberries and releasing their juices while maintaining some texture.
*
Canning Jars with Lids and Bands: Pint or half-pint jars are ideal for jam. Always use new lids to ensure a proper seal. Bands can be reused if they are in good condition. Ensure jars are clean and free from chips or cracks.
*
Water Bath Canner: Essential for sterilizing jars and safely processing sealed jars. This large pot comes with a rack to keep jars from touching the bottom and sides.
*
Ladle: For safely transferring hot jam into hot jars.
*
Canning Funnel: Helps prevent spills and keeps jar rims clean when filling.
*
Non-Metallic Spatula or Bubble Remover: Used to remove air bubbles from filled jars before sealing.
*
Clean Cloths or Paper Towels: For wiping jar rims clean.
*
Jar Lifter: For safely moving hot jars into and out of the canner.
Step-by-Step Guide to Crafting and Canning Your Jam
Making and canning
fresh strawberry chia jam is a rewarding process. Follow these steps carefully to ensure a delicious and shelf-stable product.
1. Prepare the Strawberries
Begin by washing your fresh strawberries thoroughly. Hull them (remove the green tops) and then chop them into small pieces. Place the chopped strawberries in a large bowl and use a potato masher or a fork to lightly mash them. You want to release their juices while still retaining some fruit chunks for texture in the finished jam. This step is key to getting that rustic, homemade feel.
2. Cook the Jam Base
Transfer your mashed strawberries to the large saucepan. Add the granulated sugar and fresh lemon juice. Stir gently to combine. Place the saucepan over medium heat and bring the mixture to a gentle boil, stirring frequently to prevent sticking and ensure the sugar dissolves evenly. Once boiling, reduce the heat to a simmer and continue to cook for about 5-10 minutes. During this time, the mixture will slightly thicken, and the sugar will fully dissolve. The relatively short cooking time helps preserve the strawberries' vibrant color and fresh flavor.
3. Incorporate Chia Seeds
Remove the saucepan from the heat. This is a crucial step before adding the chia seeds, as excessive boiling can degrade their gelling power. Stir in the 1/4 cup of chia seeds thoroughly. Make sure they are evenly distributed throughout the strawberry mixture. Let the jam sit undisturbed for 10-15 minutes. During this time, the chia seeds will absorb the liquid and begin to swell, thickening the jam to a spreadable consistency.
4. Sterilize Jars and Lids
While your jam is thickening, prepare your canning jars and lids. Sterilization is paramount for food safety and preventing spoilage. You can sterilize jars by boiling them in water for at least 10 minutes, ensuring they are fully submerged, or by running them through a hot cycle in your dishwasher. Keep the sterilized jars warm until you are ready to fill them. Lids should also be simmered in hot (not boiling) water to soften the sealing compound, but do not boil them as this can damage the seal.
5. Fill the Jars
Carefully remove a warm, sterilized jar from the canner or dishwasher. Place the canning funnel on top. Using a ladle, fill the hot jars with the hot
fresh strawberry chia jam, leaving approximately 1/4 inch of headspace at the top. Headspace is essential for creating a proper vacuum seal. Use a non-metallic spatula or bubble remover to gently dislodge any trapped air bubbles by running it around the inside edge of the jar.
6. Clean Rims and Seal Jars
Dip a clean, damp cloth or paper towel in warm water and carefully wipe the rims of each filled jar. Any jam residue on the rim can prevent a proper seal. Place a prepared (warmed) lid on each jar, ensuring it's centered. Screw on the bands "fingertip tight"—this means tightening just until you feel resistance, not over-tightening.
7. Process in a Water Bath Canner
Using a jar lifter, carefully place the filled and sealed jars into your water bath canner, ensuring they are on the rack and not touching each other or the sides of the pot. Fill the canner with enough hot water to cover the tops of the jars by at least 1-2 inches. Bring the water to a rolling boil. Once boiling, begin timing the processing. For pint jars, process for 10 minutes. If you live at high altitudes (above 1,000 feet), you will need to adjust your processing time according to recommended guidelines.
8. Cool and Check Seals
After the processing time is complete, turn off the heat and carefully remove the jars from the canner using your jar lifter. Place them on a clean towel or cooling rack, ensuring there's space between each jar for air circulation. Let the jars cool undisturbed for 12-24 hours. As they cool, you will likely hear a "pop" sound as the lids seal.
After cooling, check each lid for a proper seal. The center of the lid should be concave (curved inwards) and should not flex up and down when pressed. If any jars did not seal properly, refrigerate them immediately and use the jam within a few weeks. Store properly sealed jars in a cool, dark place for up to a year.
Tips for the Perfect Batch & Enjoying Your Jam
Making your own
fresh strawberry chia jam allows for a wonderful degree of customization and creativity. Here are a few extra tips to ensure every batch is a success and to inspire you to enjoy your homemade goodness:
*
Sweetness Adjustments: Taste your strawberry mixture before adding the chia seeds. If your strawberries are particularly sweet, you might use less sugar, or vice-versa. As mentioned earlier, while sugar plays a role in canning safety, for non-canned batches or if using alternatives, you have more flexibility. Honey or maple syrup can be used for a different flavor profile, but remember they may affect the final consistency and require more chia seeds.
*
Consistency Control: If you prefer a thicker jam, you can add an extra teaspoon or two of chia seeds during the thickening stage. For a looser jam, slightly reduce the amount. Remember that the jam will continue to thicken significantly as it cools.
*
Flavor Boosts: A tiny pinch of vanilla extract or a hint of balsamic vinegar can enhance the strawberry flavor in surprising ways. Just add these in the final minutes of cooking.
*
Storage Savvy: Properly sealed and canned jars will last in a cool, dark pantry for 9-12 months. Once opened, or for any jars that didn't seal, store them in the refrigerator and consume within 2-3 weeks.
*
Creative Uses: Don't limit your
fresh strawberry chia jam to just toast! Swirl it into plain Greek yogurt for a healthy breakfast, layer it in a parfait with granola, use it as a filling for thumbprint cookies, or even whisk it into vinaigrette for a fruity salad dressing. You might also find inspiration in
The Easiest Strawberry Chia Jam: No Pectin & Naturally Healthy for more serving suggestions.
Making and canning
fresh strawberry chia jam is a truly rewarding experience, offering a healthy, delicious, and convenient way to preserve the fleeting magic of fresh strawberries. By following these clear steps and understanding the role of each ingredient and tool, you’ll be well on your way to enjoying homemade goodness all year long. Embrace the simplicity and health benefits of this fantastic recipe, and let your kitchen be filled with the sweet aroma of summer!